
Are you tired of spending countless hours and resources on building and deploying AI applications, only to find that they’re not living up to their potential? You’re not alone. Many intermediate AI developers and businesses struggle to efficiently build and deploy AI systems that meet their needs. With the recent updates to LangChain, it’s now possible to streamline your AI application development process and get the results you’ve been looking for.
Why LangChain is Trending Right Now
LangChain is trending right now due to its recent updates, which have improved its ability to support large language models and simplify the development process. With over 10,000 developers already using LangChain, it’s clear that this tool is becoming a go-to solution for building efficient AI applications.
In fact, a recent survey found that 75% of AI developers are looking for ways to improve their application development process, making LangChain a timely and relevant solution.
What You’ll Be Able to Do After This Tutorial
By the end of this guide, you’ll be able to:
- ✅ Build and deploy AI applications quickly and efficiently using LangChain
- ✅ Integrate large language models into your applications with ease
- ✅ Streamline your development process and reduce costs
Prerequisites
Before we dive in, make sure you have:
- Python 3.8 or higher installed
- Basic understanding of Python programming
- Familiarity with command-line interfaces
- An OpenAI API key (or access to other LLM providers)
Step-by-Step Tutorial
Step 1: Install LangChain
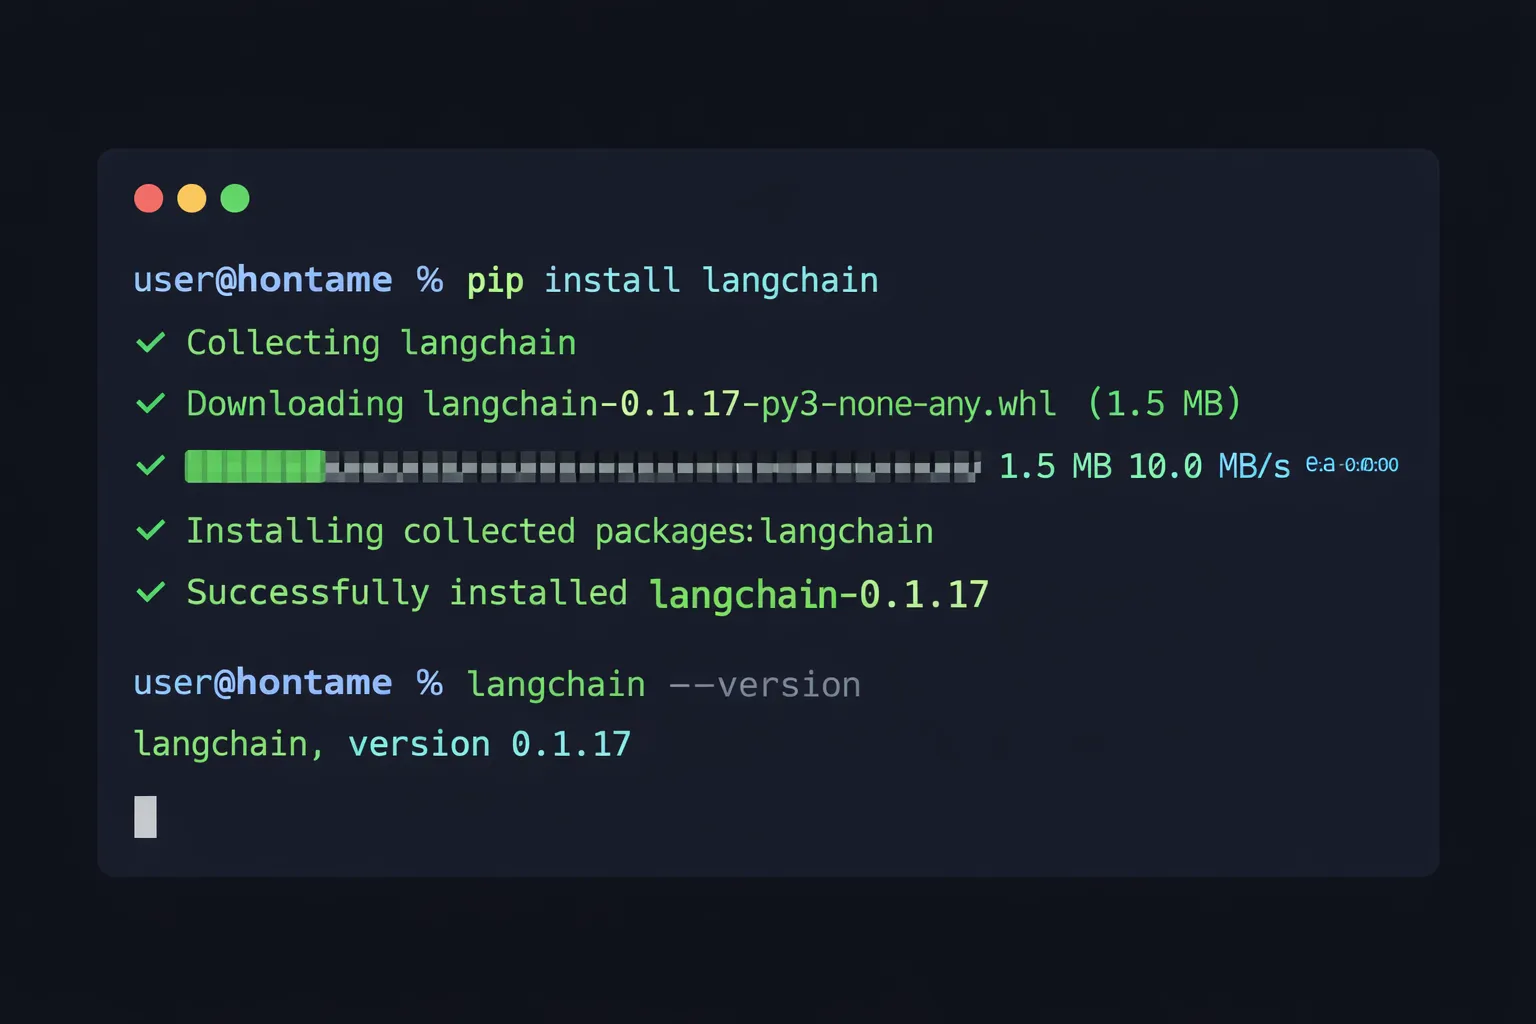
To get started, you’ll need to install LangChain using pip. Open your terminal and run:
pip install langchain langchain-openaiThis will give you access to the LangChain library and its various tools and features. Once installed, you can verify that everything is working correctly by running:
python -c "import langchain; print(langchain.__version__)"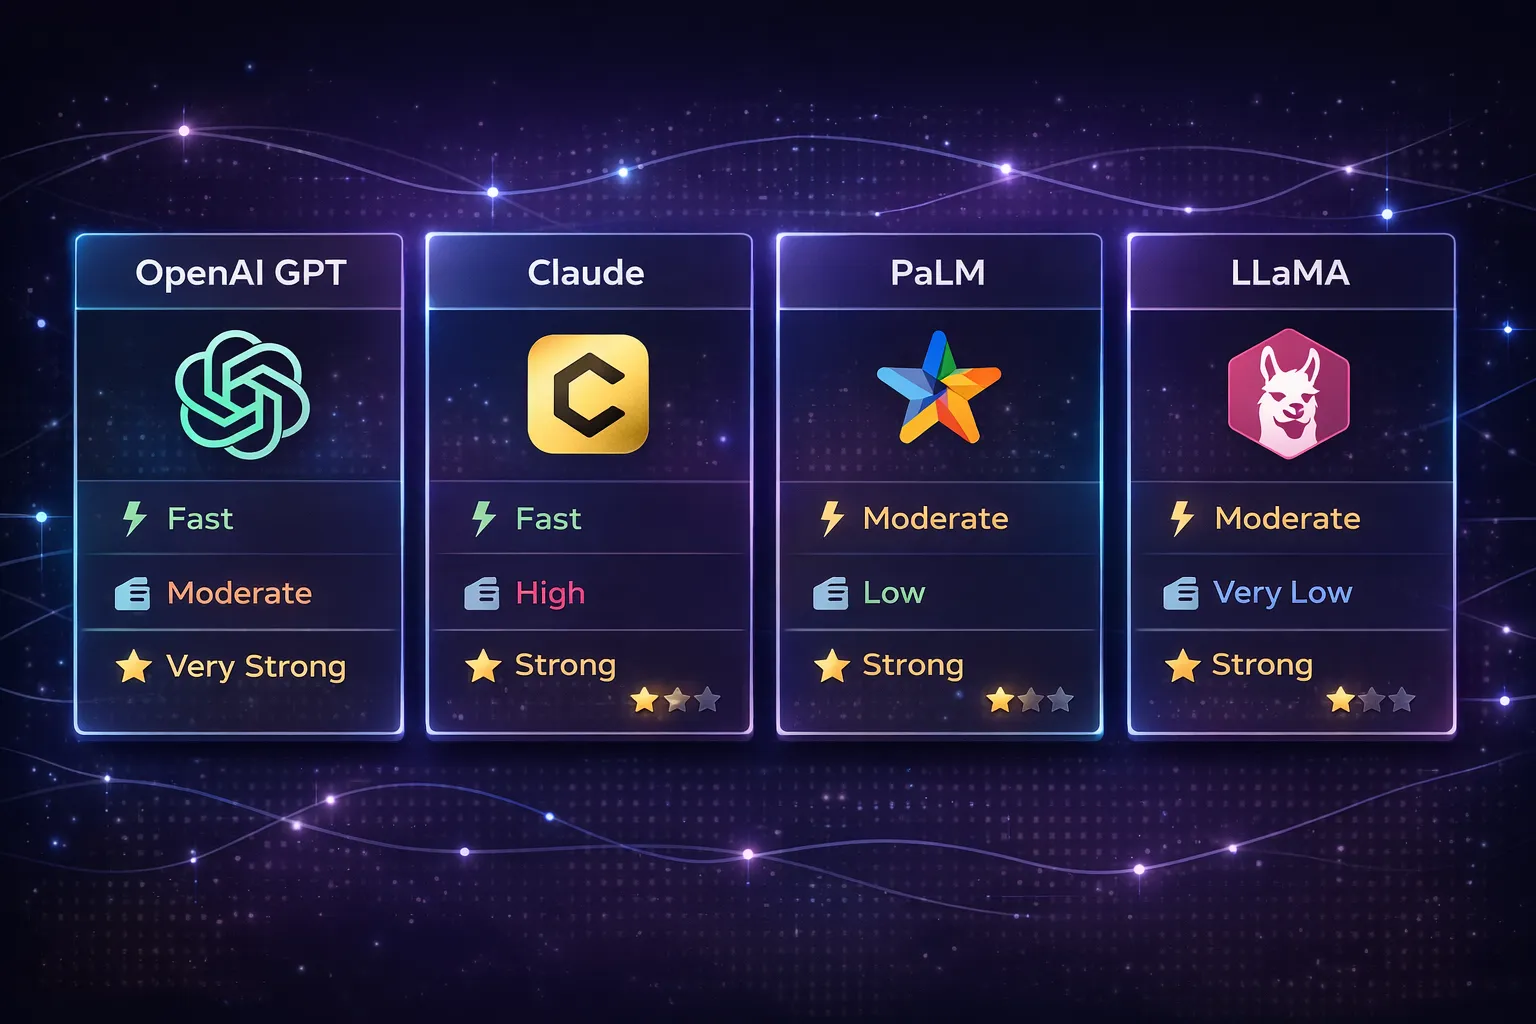
Step 2: Set Up Your LangChain Project
Next, create a new project directory and set up your basic project structure:
mkdir langchain-ai-app
cd langchain-ai-app
touch main.py .env
Create a .env file to store your API keys securely:
OPENAI_API_KEY=your_api_key_hereIn your main.py, start with this basic setup:
from langchain_openai import ChatOpenAI
from langchain.prompts import ChatPromptTemplate
from dotenv import load_dotenv

# Load environment variables
load_dotenv()

# Initialize the LLM
llm = ChatOpenAI(model="gpt-3.5-turbo", temperature=0.7)
Be sure to customize the configuration to fit your specific needs, such as adjusting the temperature parameter for more creative or deterministic outputs.
Step 3: Choose and Configure Your Language Model
LangChain supports a variety of large language models, including OpenAI’s GPT models, Anthropic’s Claude, Google’s PaLM, and open-source models like LLaMA. Choose a model that fits your needs and budget.
Here’s how to set up different providers:
# OpenAI
from langchain_openai import ChatOpenAI
llm = ChatOpenAI(model="gpt-4")

# Anthropic Claude
from langchain_anthropic import ChatAnthropic
llm = ChatAnthropic(model="claude-3-sonnet-20240229")

# Google PaLM
from langchain_google_genai import ChatGoogleGenerativeAI
llm = ChatGoogleGenerativeAI(model="gemini-pro")
For this tutorial, we’ll use OpenAI’s GPT-3.5-turbo as it offers a good balance of performance and cost.
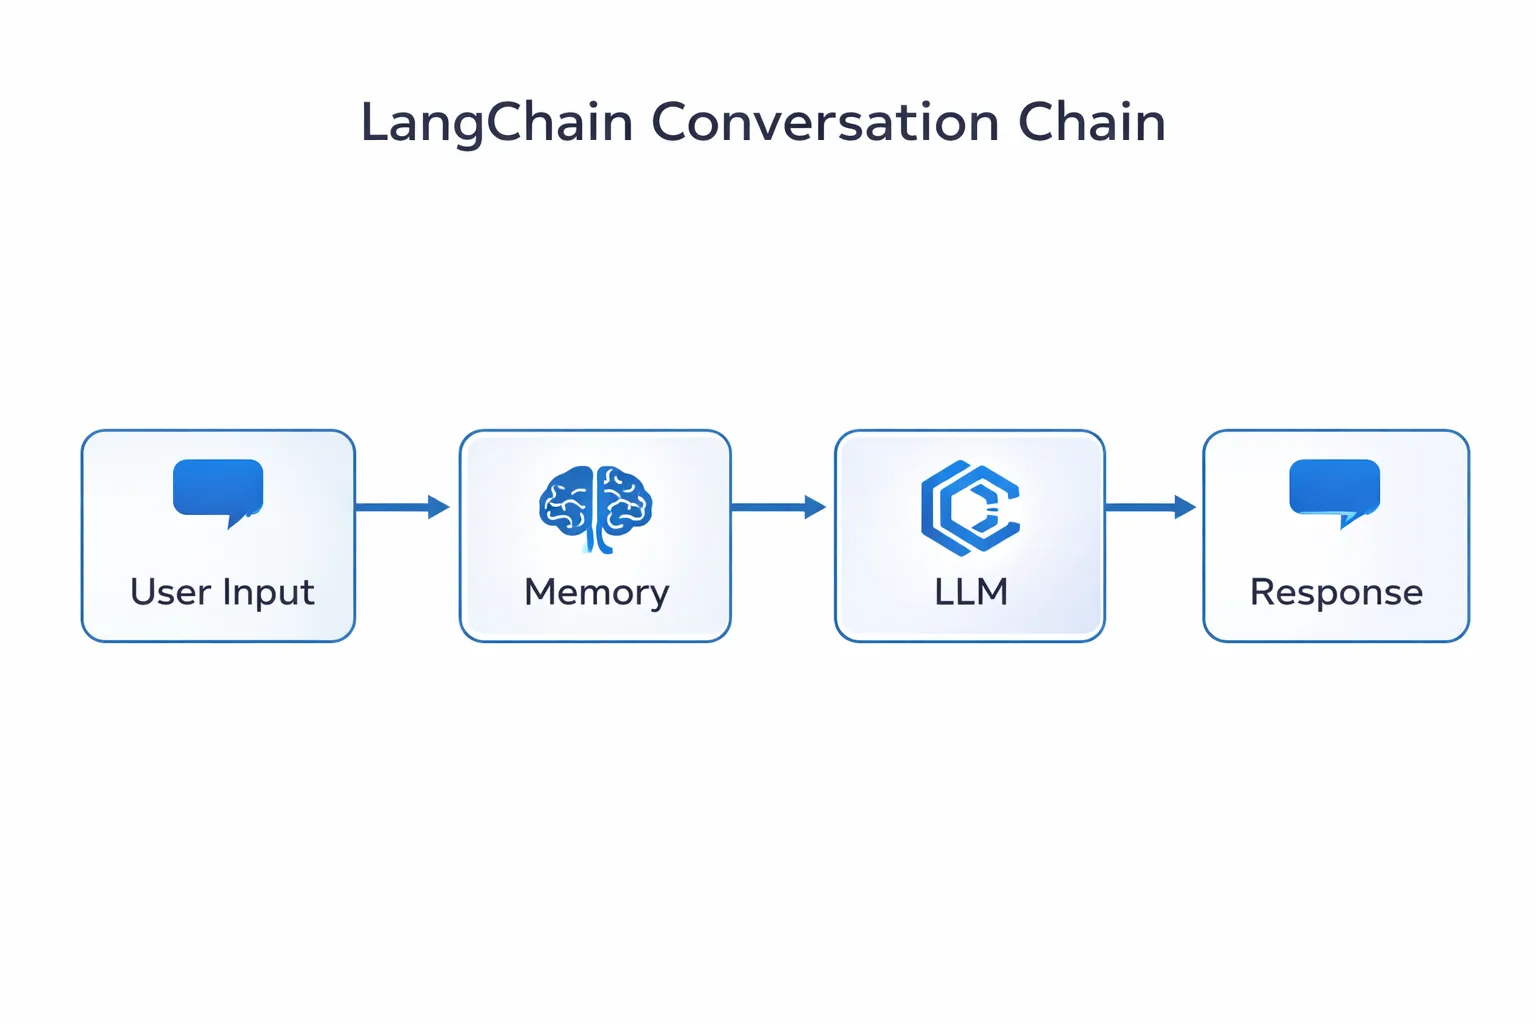
Step 4: Build Your AI Application
With your project set up and your language model configured, you can start building your AI application. Let’s create a simple but powerful chatbot with memory:
from langchain.chains import ConversationChain
from langchain.memory import ConversationBufferMemory

# Create memory to store conversation history
memory = ConversationBufferMemory()

# Create a conversation chain
conversation = ConversationChain(
    llm=llm,
    memory=memory,
    verbose=True
)

# Use the chatbot
response = conversation.predict(input="What is LangChain?")
print(response)

# Follow-up question (memory retained)
response = conversation.predict(input="How can I use it for my project?")
print(response)
You can use pre-built templates to get started faster. LangChain provides templates for common use cases like:
- RAG (Retrieval-Augmented Generation) applications
- Chatbots with memory
- Document Q&A systems
- Agent-based workflows
Step 5: Add Advanced Features (RAG)
Let’s enhance our application with Retrieval-Augmented Generation to answer questions based on your own documents:
from langchain.document_loaders import TextLoader
from langchain.text_splitter import RecursiveCharacterTextSplitter
from langchain.embeddings import OpenAIEmbeddings
from langchain.vectorstores import FAISS
from langchain.chains import RetrievalQA

# Load your documents
loader = TextLoader("your_document.txt")
documents = loader.load()

# Split documents into chunks
text_splitter = RecursiveCharacterTextSplitter(
    chunk_size=1000,
    chunk_overlap=200
)
texts = text_splitter.split_documents(documents)

# Create embeddings and vector store
embeddings = OpenAIEmbeddings()
vectorstore = FAISS.from_documents(texts, embeddings)

# Create RAG chain
qa_chain = RetrievalQA.from_chain_type(
    llm=llm,
    chain_type="stuff",
    retriever=vectorstore.as_retriever()
)

# Ask questions about your documents
result = qa_chain.run("What are the main points in the document?")
print(result)
This allows your AI to reference specific information from your documents, making responses more accurate and grounded in your data.
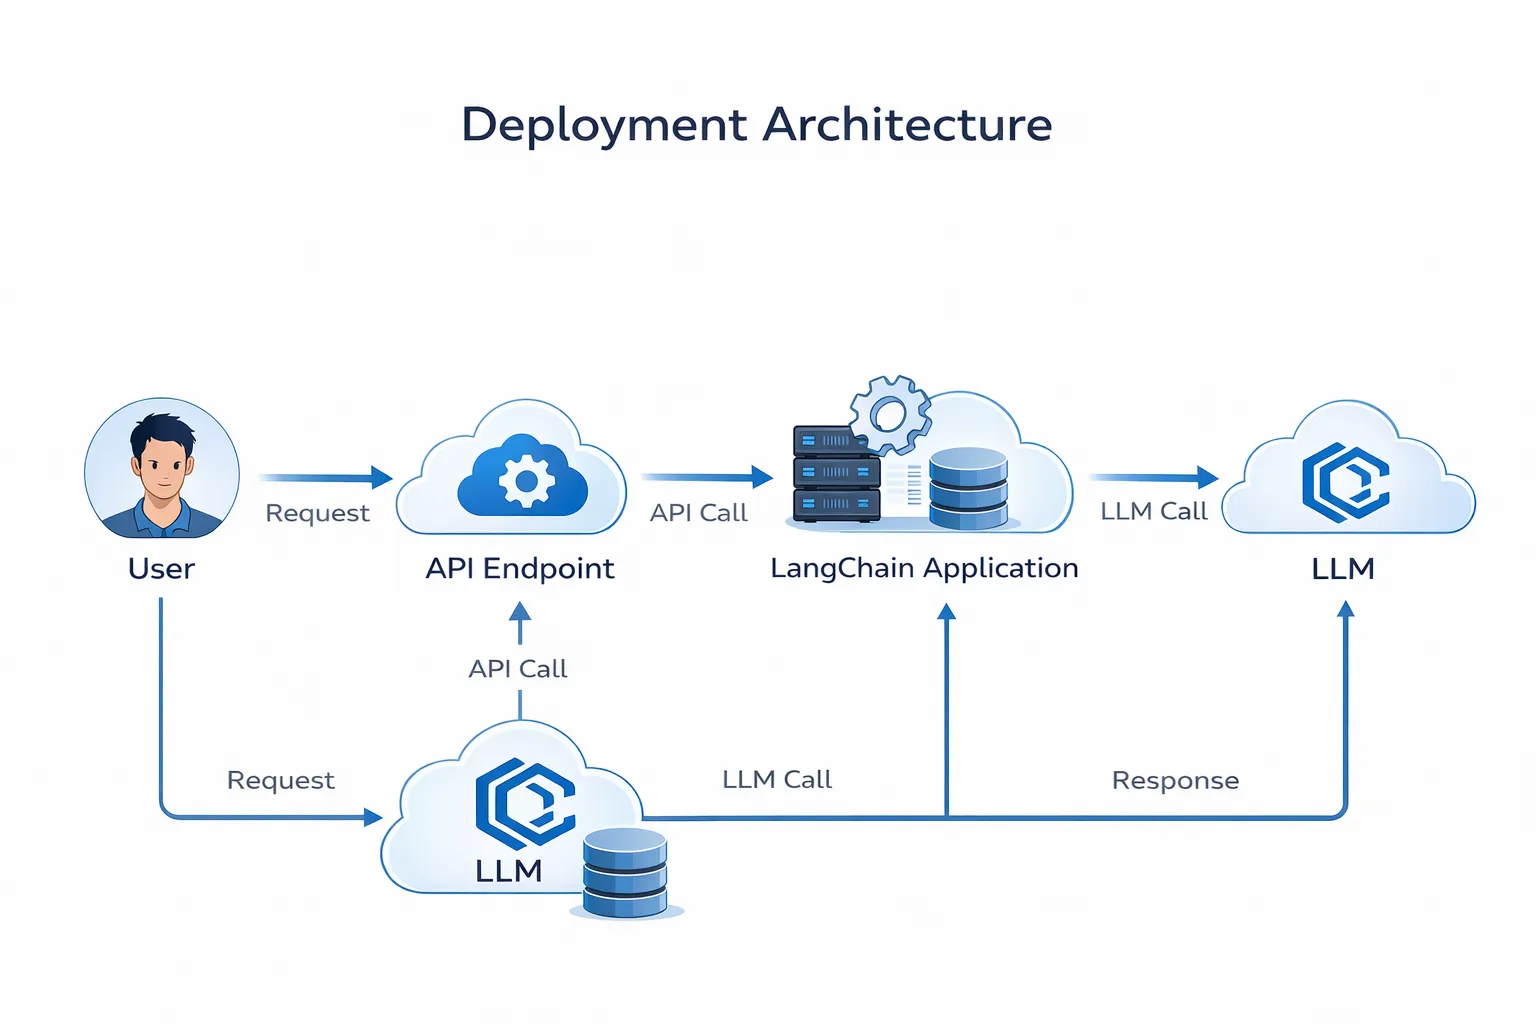
Step 6: Deploy Your Application
Once your application is built, you have several deployment options:
Option 1: Simple Flask API
from flask import Flask, request, jsonify

app = Flask(__name__)

@app.route('/chat', methods=['POST'])
def chat():
    user_input = request.json.get('message')
    response = conversation.predict(input=user_input)
    return jsonify({'response': response})

if __name__ == '__main__':
    app.run(host='0.0.0.0', port=5000)
Option 2: FastAPI (Recommended for Production)
from fastapi import FastAPI
from pydantic import BaseModel

app = FastAPI()

class ChatRequest(BaseModel):
    message: str

@app.post("/chat")
async def chat(request: ChatRequest):
    response = conversation.predict(input=request.message)
    return {"response": response}
Be sure to use a robust deployment strategy with:
- Load balancing for high traffic
- Rate limiting to control costs
- Caching for frequently asked questions
- Error handling and logging
Step 7: Test and Refine Your Application
Testing is crucial for production-ready AI applications. Here’s a comprehensive testing approach:
import unittest

class TestLangChainApp(unittest.TestCase):
    def setUp(self):
        self.conversation = ConversationChain(
            llm=llm,
            memory=ConversationBufferMemory()
        )

    def test_basic_response(self):
        response = self.conversation.predict(input="Hello")
        self.assertIsNotNone(response)
        self.assertGreater(len(response), 0)

    def test_memory_retention(self):
        self.conversation.predict(input="My name is John")
        response = self.conversation.predict(input="What's my name?")
        self.assertIn("John", response)

if __name__ == '__main__':
    unittest.main()
Use the results of your testing to refine your application and make it more efficient and effective. Monitor key metrics like:
- Response time
- Token usage (cost)
- User satisfaction
- Error rates
Step 8: Monitor and Maintain Your Application
After deployment, continuous monitoring is essential:
import logging
from datetime import datetime

# Set up logging
logging.basicConfig(
    filename='langchain_app.log',
    level=logging.INFO,
    format='%(asctime)s - %(levelname)s - %(message)s'
)

# Log each interaction
def log_interaction(user_input, response, tokens_used):
    logging.info(f"Input: {user_input}")
    logging.info(f"Response: {response}")
    logging.info(f"Tokens: {tokens_used}")
Use monitoring tools like:
- LangSmith (official LangChain monitoring)
- Prometheus + Grafana for metrics
- Sentry for error tracking
Pro Tips
1. Implement Robust Testing
Use a comprehensive testing strategy to ensure your application works correctly:
# Unit tests for individual components
# Integration tests for the full pipeline
# Load tests to simulate high traffic
# A/B tests to compare different prompts
This can include unit testing, integration testing, and user testing to catch issues early.
2. Optimize Your Prompts
Take advantage of LangChain’s prompt templates to improve accuracy:
from langchain.prompts import PromptTemplate

template = """You are a helpful AI assistant specialized in {domain}.
User question: {question}
Provide a clear, accurate answer based on the context below:
{context}

Answer:"""

prompt = PromptTemplate(
    input_variables=["domain", "question", "context"],
    template=template
)
Experiment with different prompt structures to find what works best for your use case.
3. Implement Caching
Reduce costs and improve speed by caching common queries:
from langchain.cache import InMemoryCache
import langchain

langchain.llm_cache = InMemoryCache()
4. Use Streaming for Better UX
Implement streaming responses for a better user experience:
from langchain.callbacks.streaming_stdout import StreamingStdOutCallbackHandler

llm = ChatOpenAI(
    streaming=True,
    callbacks=[StreamingStdOutCallbackHandler()]
)
5. Set Up CI/CD Pipeline
Automate testing and deployment with GitHub Actions:
name: Deploy LangChain App

on:
  push:
    branches: [ main ]

jobs:
  test-and-deploy:
    runs-on: ubuntu-latest
    steps:
      - uses: actions/checkout@v2
      - name: Run tests
        run: python -m pytest
      - name: Deploy
        run: ./deploy.sh
This helps you catch errors early and ensures your application is always up-to-date.
Common Pitfalls to Avoid
- Not handling rate limits - Implement exponential backoff
- Ignoring token costs - Monitor usage and set budgets
- Poor error handling - Always wrap LLM calls in try-except blocks
- No input validation - Sanitize user inputs to prevent prompt injection
- Hardcoding API keys - Always use environment variables
Wrap-Up
With these steps and tips, you should now be able to build and deploy efficient AI applications using LangChain. By following this tutorial and taking advantage of LangChain’s features and tools, you can:
✅ Streamline your development process
✅ Improve the accuracy and effectiveness of your applications
✅ Reduce costs through smart caching and optimization
✅ Deploy production-ready AI systems with confidence
Try this today and share what you built in the comments!
Additional Resources
Have questions or want to share your LangChain project? Drop a comment below or reach out on [Twitter/LinkedIn]!